
The short answer
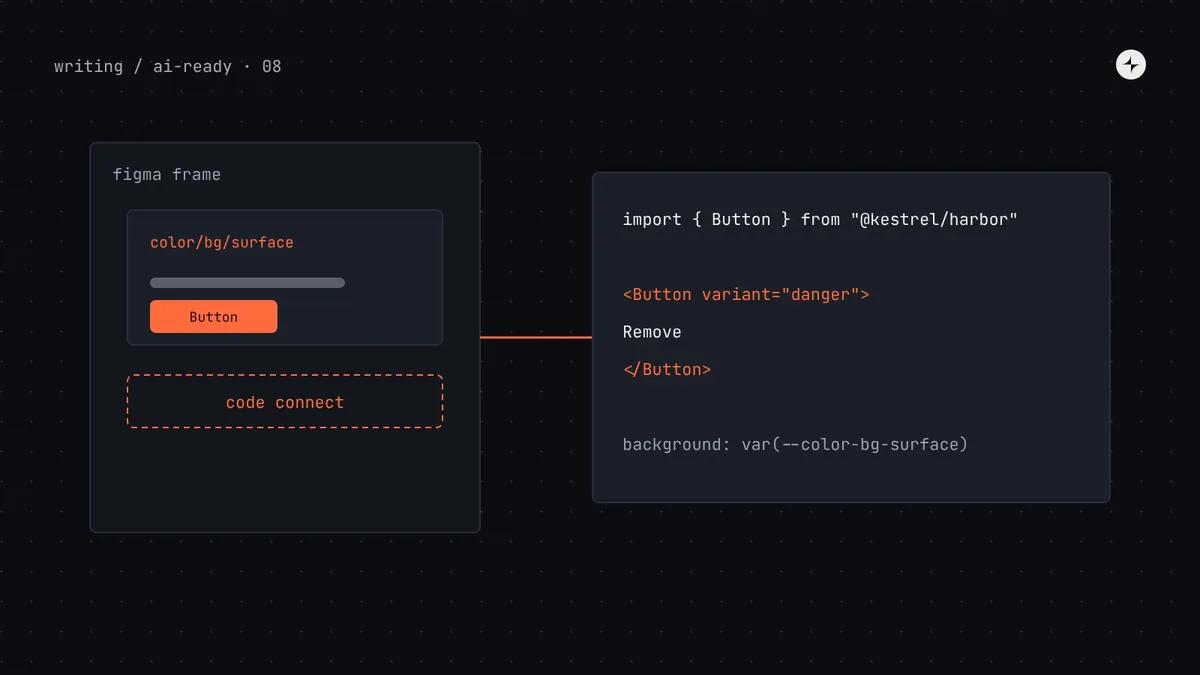
Figma's MCP server lets coding agents read a Figma frame's structure, variables, component names and screenshots, so they can turn designs into code. What they produce depends on how the file is built. To get code that uses your real design system: use variables for every colour, spacing and radius, named to match your code tokens and with code syntax set; build components with properties that mirror code props (Variant = primary, secondary, danger); write component descriptions; keep instances attached and layouts in auto layout; and connect Figma components to code components with Code Connect, so the agent sees your real import and props instead of a description of rectangles. Then generate a design system rules file and prompt with a link to a specific frame.
- Without Code Connect, the agent sees what a button looks like. With it, it sees
<Button variant="danger">. - If a designer used a raw hex instead of a variable, the variable tools have nothing to return.
- Part 8 of 20 in the series on AI-ready design systems.
The problem: the agent can only see what the file says
So far this series has prepared the code side: tokens (part 3), component metadata (part 4), docs (part 5), rules files (part 6) and an MCP server (part 7). But many UI tasks start in Figma: "build this screen". When an agent reads a Figma frame, it gets layers, properties and values. If the file is messy, the code will be too.
An illustration: the payslip screen
A designer's payslip screen. Half the buttons are detached instances. The card is a frame called "Frame 4182" with a hard-coded #F6F8FB fill. Spacing is a mix of 14, 16 and 18px. The table is grouped rectangles.
A new PayslipCard with inline styles, three hard-coded colours, a hand-built table with <div>s, and buttons styled to look like Harbor's but not actually Harbor's.
The agent faithfully converted what it saw. Detached instances and raw values carry no link to the system, so there was nothing to tell it "this is Harbor's Button" or "this is bg.surface.subtle".
How the Figma MCP server works
Figma offers an official MCP server in two forms: a remote server hosted by Figma at https://mcp.figma.com/mcp, which Figma recommends for most people, and a desktop server that runs through the Figma desktop app for specific organisational needs. With the remote server you give the agent a link to a frame or layer; the desktop server can also work from your current selection.
import { Button } from "@kestrel/harbor"var(--color-bg-surface-subtle)At the time of writing, the server's tools include, among others:
| Tool | What it returns | Depends on in your file |
|---|---|---|
get_design_context | The main design-to-code context for a layer or selection; defaults to React and Tailwind, adaptable by prompt | Auto layout, instance names, variables, Code Connect |
get_variable_defs | The variables and styles used in a selection (colours, spacing, type) | Values bound to variables, not typed in |
get_metadata | A lightweight outline of the layer tree (names, types, positions) | Meaningful layer names |
get_screenshot | An image of the selection, so the layout stays accurate | Nothing; it's always useful |
get_code_connect_map | Which Figma components map to which code components | Code Connect set up for the library |
create_design_system_rules | A rules file to guide agents turning designs into code for your system | A well-structured library |
Variable: Figma's name for a stored value (colour, number, string, boolean) that layers can be bound to, with modes such as light and dark: Figma's equivalent of a design token. Code syntax: a setting on a variable that records its name in code, such as var(--color-bg-surface). Code Connect: Figma's way of linking a design component to the real code component and showing a code snippet for it. Detached instance: a copy of a component that's been disconnected from the library, so it no longer updates and no longer identifies as that component.
Step 1: connect the server
Setup takes a few minutes. For Claude Code with the remote server:
claude mcp add --transport http figma https://mcp.figma.com/mcp
# then run /mcp inside Claude Code and sign in to Figma when prompted
Other clients (Cursor, VS Code, Codex) add the same URL in their MCP settings. Figma's docs list the exact steps for each. Commit nothing secret: the sign-in happens per person through OAuth.
Step 2: make variables match your tokens
This is the most important step. When a frame's values are bound to variables whose names match your code tokens, the agent can write var(--color-feedback-info-bg) directly. When they're raw values, it can only copy the hex.
| Code token (DTCG) | Figma variable | Code syntax (Web) |
|---|---|---|
color.bg.surface | color/bg/surface | var(--color-bg-surface) |
color.feedback.info.bg | color/feedback/info/bg | var(--color-feedback-info-bg) |
space.inset.md | space/inset/md | var(--space-inset-md) |
radius.control | radius/control | var(--radius-control) |
Generate Figma variables from the token source
Keep the DTCG files as the source (part 3) and sync them into Figma with a plugin such as Tokens Studio, or with Figma's Variables REST API (available on Enterprise plans). Hand-maintaining both sides guarantees drift.
Hide primitives from publishing
Put primitive colours in a separate collection and hide them from publishing, so designers bind layers to semantic variables only, just as product code uses semantic tokens only.
Set code syntax on every semantic variable
In the variable's settings, add the Web code syntax (
var(--color-bg-surface)). Dev Mode then shows the CSS name, and tools working from the file can use it.Add descriptions
Variables have a description field. Copy each token's
$descriptioninto it as part of the sync, so designers see the same "Use for… Not for…" guidance that agents do.
Step 3: make component properties mirror code props
A Figma component's properties should be the same decisions as the code component's props, with the same names and values wherever possible. Then a mapping (step 5) is mechanical, and anyone, person or agent, can move between the two.
Figma organised by appearance
Button
  Type: Filled / Outline / Text / Red
  State: Default / Hover / Disabled
  Has icon: Yes / No
  Size: 32 / 40
"Red" is a colour, not a job; "Outline" doesn't exist in code; sizes are pixel values.
Figma organised like the code
Button
  Variant: Primary / Secondary / Ghost / Danger
  Size: Small / Medium
  Disabled: true / false     (boolean)
  Loading: true / false      (boolean)
  Label: "Save changes"      (text)
  Icon start: ⟨instance swap⟩
The same four variants as the variant prop. Hover is shown in the playground, not as a variant to pick.
- Use text properties for labels, so the agent receives "Remove from payroll" as data, not as a layer named "Label".
- Use boolean properties for on/off props, and instance-swap properties for slots like icons.
- Fill in the component description with the same purpose sentence as the code metadata: "Triggers an action on the current page. For navigation use Link."
- Link the description to the docs page using the component's documentation link field.
More on library organisation in organising a Figma library.
Step 4: clean product files where it matters
The library can be perfect and a product file can still confuse an agent. You don't need to clean every file. Focus on frames that will be handed to agents, and ask designers to follow four habits:
| Habit | Why it matters to the agent |
|---|---|
| Use library instances; don't detach | An attached instance says "this is Harbor's Button, variant Danger". A detached one is anonymous rectangles. |
| Use auto layout | Auto layout converts naturally into flex and grid layouts with gaps from spacing variables. Absolute positioning turns into brittle coordinates. |
| Name meaningful frames | "Payslip summary" and "Deductions table" become component and section names. "Frame 4182" becomes Frame4182. |
| Bind every value to a variable | No variable, no token. Library analytics and linting plugins can find raw values. |
Make a "ready for build" checklist part of design handoff: instances attached, auto layout, variables bound, frames named. It's the same checklist good engineering handoff always needed. Agents just make the cost of skipping it visible immediately.
Step 5: connect components with Code Connect
Code Connect links each Figma component to its code component, including how Figma properties map to props. Once it's set up, the Figma MCP server can give the agent your actual component and props instead of a description of what the design looks like. It's available on Figma's Organization and Enterprise plans.
There are two ways to set it up: Code Connect UI, mapping components inside Figma without code, and the Code Connect CLI, which keeps mappings as files in your repo. The CLI version is more precise and is reviewed like code, so it's what we recommend for design system teams.
// packages/harbor/src/Button/Button.figma.tsx
import figma from "@figma/code-connect";
import { Button } from "./Button";

figma.connect(Button, "https://www.figma.com/design/AbC123/Harbor?node-id=12-345", {
  props: {
    label: figma.string("Label"),
    variant: figma.enum("Variant", {
      Primary: "primary",
      Secondary: "secondary",
      Ghost: "ghost",
      Danger: "danger",
    }),
    size: figma.enum("Size", { Small: "sm", Medium: "md" }),
    disabled: figma.boolean("Disabled"),
    loading: figma.boolean("Loading"),
  },
  example: ({ label, variant, size, disabled, loading }) => (
    <Button variant={variant} size={size} disabled={disabled} loading={loading}>
      {label}
    </Button>
  ),
});
// figma.config.json at the package root
{ "codeConnect": { "include": ["src/**/*.figma.tsx"] } }npm install --save-dev @figma/code-connect
npx figma connect publish # needs a Figma access token with Code Connect write accessPublish from CI on each release, so the mappings always match the version in the library. Start with your 10 most-used components; they cover most of any screen.
Step 6: generate a design-system rules file
Figma's server includes a tool, create_design_system_rules, that drafts a rules file describing how designs in your files should become code in your project. Run it once, then edit it and merge it into the AGENTS.md from part 6, so there's one set of rules rather than two that disagree.
<!-- AGENTS.md: added section -->
## Implementing Figma designs
- Use the Figma MCP server for design context and a screenshot of the linked frame.
- When Code Connect returns a component, use exactly that component and its props.
- When it doesn't, call harbor.search_components before writing anything new.
- Map Figma variables to CSS variables by name (color/bg/surface → var(--color-bg-surface)).
- Never copy hex values or pixel sizes from Figma output. If a value has no variable,
  call harbor.search_tokens and mention the unbound value in your reply.
- Don't add Tailwind defaults or new components to match a design.
Before and after: the payslip card
export function Frame4182() {
  return (
    <div style={{ background: "#F6F8FB",
      padding: 18, borderRadius: 10 }}>
      <div style={{ fontSize: 15,
        color: "#5A6270" }}>Net pay</div>
      <div style={{ fontSize: 28 }}>
        ₹84,250</div>
      <button className="bg-blue-600
        text-white rounded-lg px-4">
        Download payslip</button>
    </div>
  );
}import { StatCard, Button } from
"@kestrel/harbor";
import { formatMoney } from
"@kestrel/harbor/format";
export function PayslipSummary({ payslip }) {
return (
<StatCard
title="Net pay"
stats={[{ label: "This month",
value: formatMoney(payslip.net,
"INR") }]}
action={<Button variant="secondary">
Download payslip</Button>}
/>
);
}Same design, same agent. The second result came from attached instances with Code Connect, bound variables, a named frame, and the rules above.
How to prompt from a Figma frame
Even with a clean file, the prompt matters. Link to a specific frame, not a whole page, and say what to reuse.
How to check it works
Pick five representative frames
A form, a table, a dashboard card, a dialog, an empty state, from real product files.
Generate code for each and score it
Count non-Harbor components, raw values and invented helpers, as in the part 2 audit. Note which came from library problems and which from product file problems.
Check Code Connect coverage
What share of instances in those frames have a mapping? Prioritise mapping the components that appear most.
Watch detach rates
Figma's library analytics show how often components are detached. High detach rates point to components that don't meet designers' needs, which is useful feedback for the system team as well as for agents.
Common mistakes
Different names in Figma and code
"Info/Background" in Figma, feedback.info.bg in code. The agent can't connect them, and neither can a new hire.
Visual states as variants
Hover and pressed as variants make the property list longer than the props. Keep variants for decisions people make.
Linking whole pages
A link to a page with 40 frames floods the context. Link the frame you want built.
Trusting generated code because it looks right
A pixel-perfect result can still be off-system or inaccessible. Lint, type checks and tests in part 9 apply to design-to-code output too.
The short version
- The Figma MCP server gives agents a frame's structure, variables, screenshot and Code Connect mappings.
- Variables named like your tokens, with code syntax set, turn into real CSS variables.
- Component properties should mirror code props; Code Connect links them for the agent.
- Attached instances, auto layout, named frames and bound values make product files usable.
- Generate a rules file with Figma's tool, merge it into AGENTS.md, and prompt with a specific frame.
Next: Guardrails for AI-generated UI, the checks that catch whatever still slips through, and how to measure improvement.
Frequently asked questions
What is the Figma MCP server?
Figma's official Model Context Protocol server. It lets AI coding agents read design context from Figma files (layer structure, variables, component names, screenshots and Code Connect mappings) so they can implement designs in code. It's available as a remote server hosted by Figma and as a desktop server.
What is Figma Code Connect?
A Figma feature that links design components to the real code components, including how Figma properties map to props. Dev Mode and the Figma MCP server can then show your actual component code instead of generated approximations. It's available on Organization and Enterprise plans.
Why does Figma-to-code AI ignore my design system?
Usually because the file doesn't identify the system: detached instances, raw values instead of variables, components without Code Connect, and properties that don't match code props. The agent converts what it sees.
Should Figma variable names match design token names?
Yes. Use the same structure (color/bg/surface in Figma, color.bg.surface in tokens, --color-bg-surface in CSS), set code syntax on each variable, and generate variables from the token source so they can't drift.
Do I need to clean up every Figma file for AI?
No. Get the library right first, then apply a short "ready for build" checklist to frames that will be implemented: attached instances, auto layout, bound variables and meaningful frame names.
Further reading
- Figma MCP server documentationSetup, tools and prompts for the remote and desktop servers.
- Figma Code ConnectCode Connect CLI and UI, with the property helpers used above.
- Figma MCP server guide (GitHub)Figma's own guide and examples.
- Tokens Studio documentationSyncing DTCG tokens with Figma variables.
- Keeping Figma and code in syncThe broader practice behind this setup.